This post is part of a 6 part series. Jump to [part 1][part 2][part 4][part 5][part 6]
Okay put your propeller hats on …
As I mentioned in my last post, I am going to run the PowerShell script periodically to gather new data. This is easily accomplished with a batch file and a Windows scheduled task. Here’s the batch file:
@echo off
powershell.exe -noninteractive w:\qfarm\Count-CitrixSession.ps1
exit
I’m going to run this batch file every 3 minutes with Windows Scheduled Tasks. It will take a minute to run, so we’ll get updated data about every 4 minutes. To import this data, we will have to create a database/table to hold it. For this case, I’m using an MS SQL 2005, so I’ll open Management Studio.

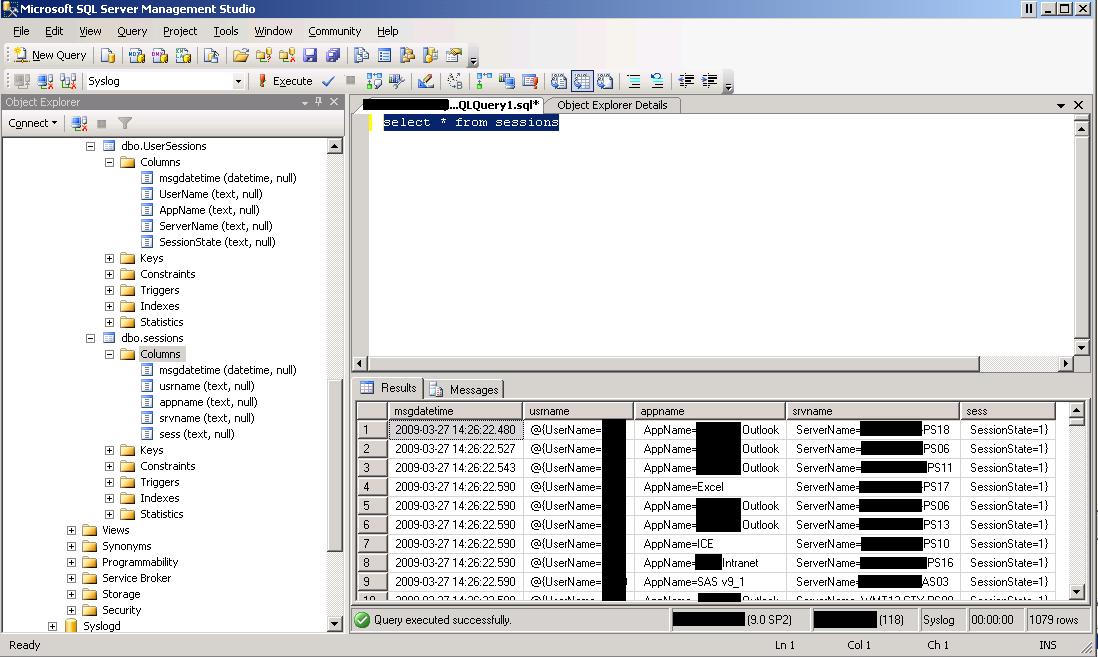
Next, we’ll create a database and table (in this example, the database is already created). The table will consist of a time/date stamp field and 4 fields that are from the output of the PoSH script.
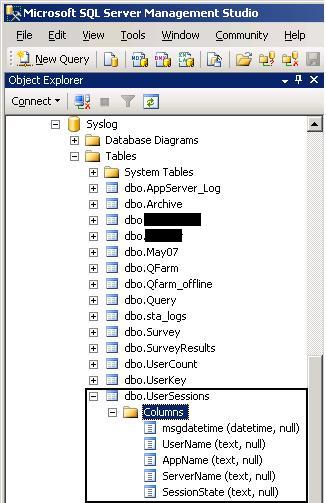
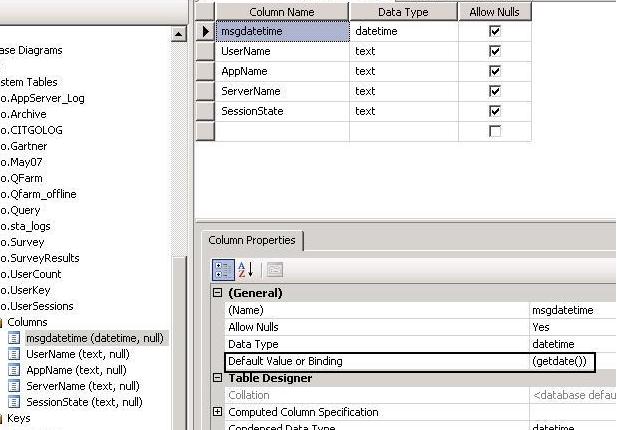
The little bit of cleverness in this table lies with the msgdatetime column. Its default value (which you set when you create the table) is the getdate() function in MS SQL. That way, it will always get the current date and time that the row was created. The other columns will be a plain text data type, which we will have to convert when we do certain queries.
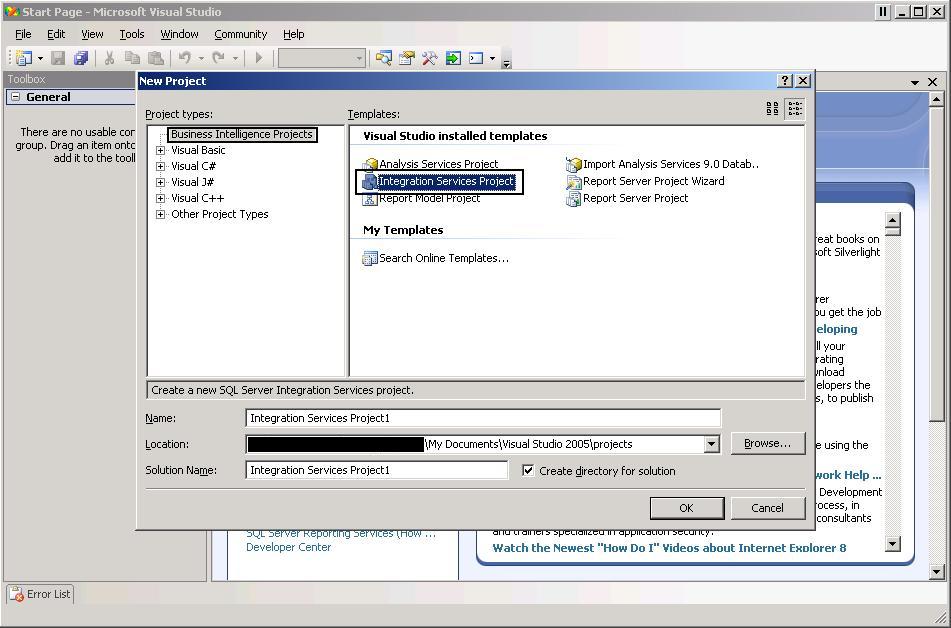
Now we have the text file that’s being updated every 4 minutes (approximately) and a table to hold the data. I’m going to use Visual Studio 2005 to actually do the import. Run VS and create a new Integration Services Project.
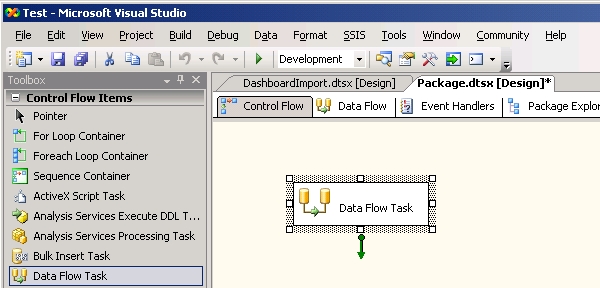
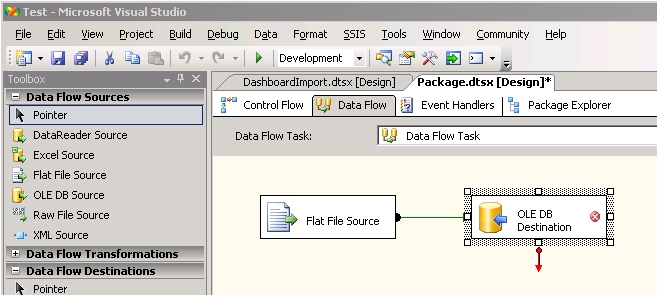
Now drag a Data Flow Task into your design window.
Double-click the new Data Flow Task and drag over a flat file source (to read the text files) and an OLE DB Destination (to communicate with the database).
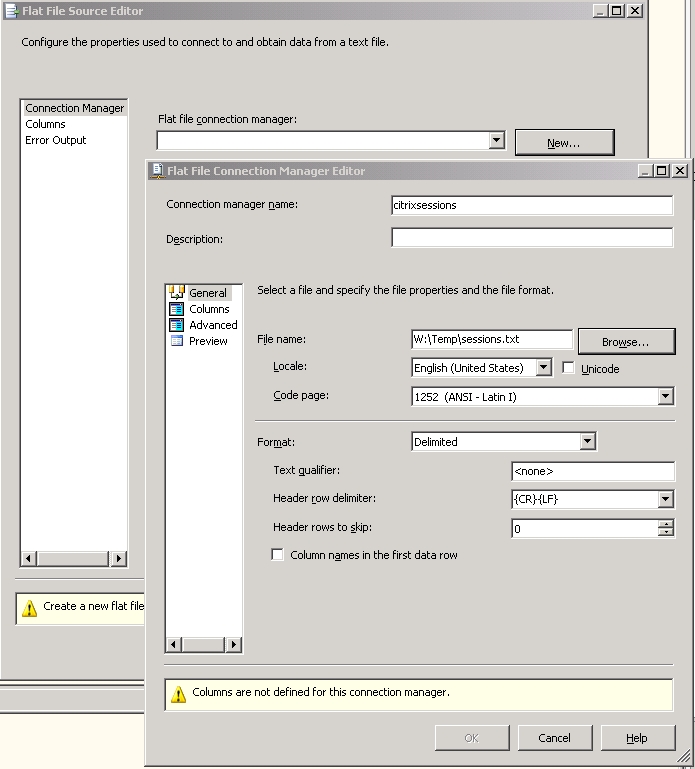
Double-click the Flat File Source and create a new Flat file connection manager. Give the connection manager a name and click Browse to point it to the text file that the PoSH script is creating.
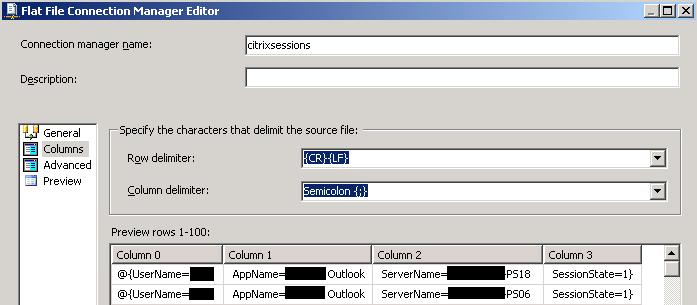
Now, we have to set the properties of the connection manager to correctly parse the text file. This will allow easy import of the data into our database table. In this case, we can use a semicolon as the column delimiter and {CR}{LF} as the row delimiter. This gives us 4 columns with the username, the applicationame, the servername, and the session state.
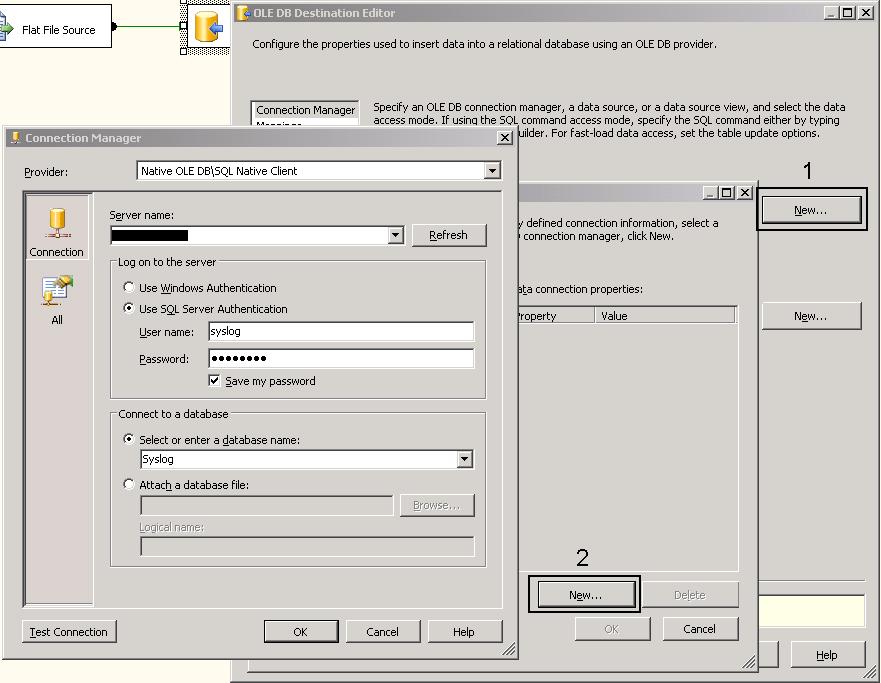
Next, drag the green arrow from Flat File Source to OLE DB Destination. Double-click on the OLE DB Destination and create a new OLE DB Connection manager. Enter in the ODBC information to connect to the database and select the database we want to use.
Now we can select the table we created before.
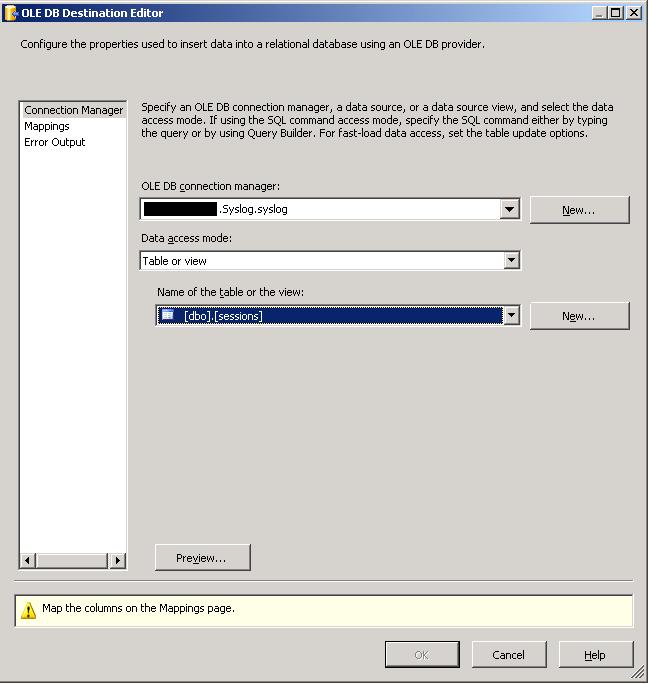
Select Mapping to coorelate the fields in the text file with the fields in the table.

Now to test the data flow, click the green triangle in the tool bar or use the Debug menu and Start Debugging. You should get confirmation that a number of rows were imported. A quick query of the table in SQL can confirm that it has data.
Next post will deal with uploading the project to an SQL server and creating a schedule that will automatically run, thus importing new data into the database on a recurring schedule.
This post is part of a 6 part series. Jump to [part 1][part 2][part 4][part 5][part 6]
Value for Value
If you received any value from reading this post, please help by becoming a supporter.
Thanks for reading,
Alain