
Intro
If you deploy images with a Microsoft product, you are using WinPE (Microsoft Windows Preinstallation Environment) to configure and install an operating system. If you use XenServer for your Hypervisor of choice, then you will have to extract the XenServer drivers to import into your WinPE
Extracting the Files
The simplest way to get the files is to load the XenTools ISO onto a system and copy the install files over to a temporary location. Select your Virtual Machine, click the Console tab and select the DVD Drive drop down and select guest-tools.iso. In this case, my XenServer environment is on version 8.1.

This will mount the current XenServer tools ISO onto the virtual machine's DVD drive.
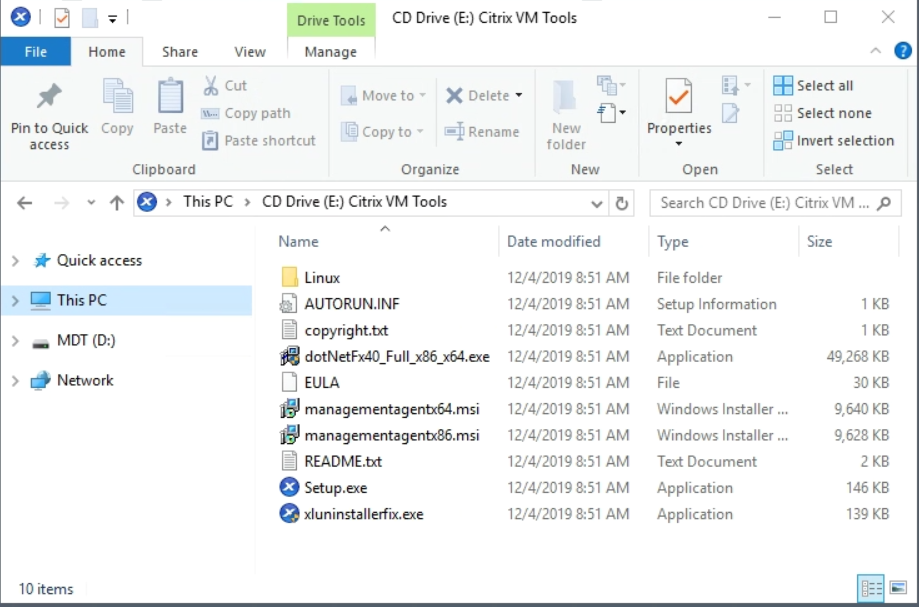
To get the drivers, copy managementagentx64.msi (and managementagentx86.msi if you need drivers for a 32-bit operating system) to a temporary location on your system.
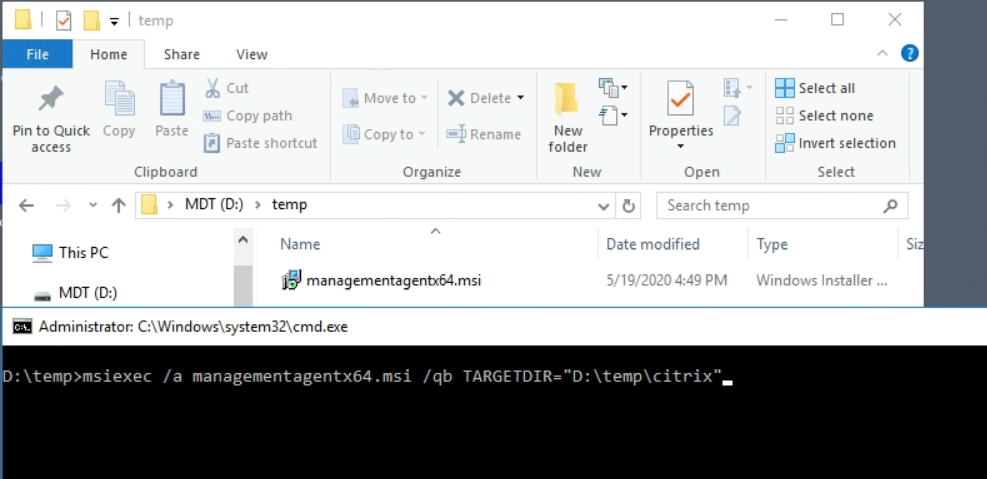
Here, we have the managementagentx64.msi file in the D:\temp folder. To extract the files we run the following command:
msiexec.exe /a managementagentx64.msi /qb TARGETDIR="D:\temp\drivers"
This runs installs managementagentx64.msi as an administrative install. This is why we used /a as a parameter and the TARGETDIR parameter so it will expand the MSI files into the D:\temp\drivers folder. I also used /qb to run the install in Quiet mode with a Basic GUI.
After running this command, we can now drill-down into folders created by the administrative install.
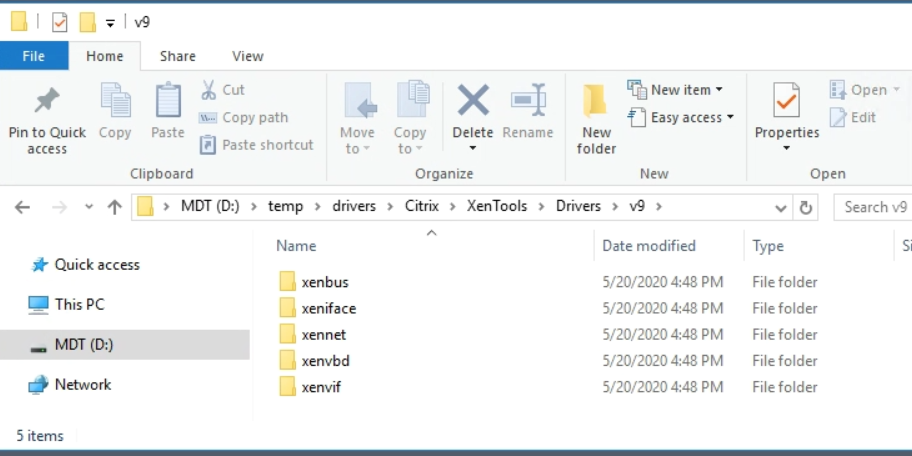
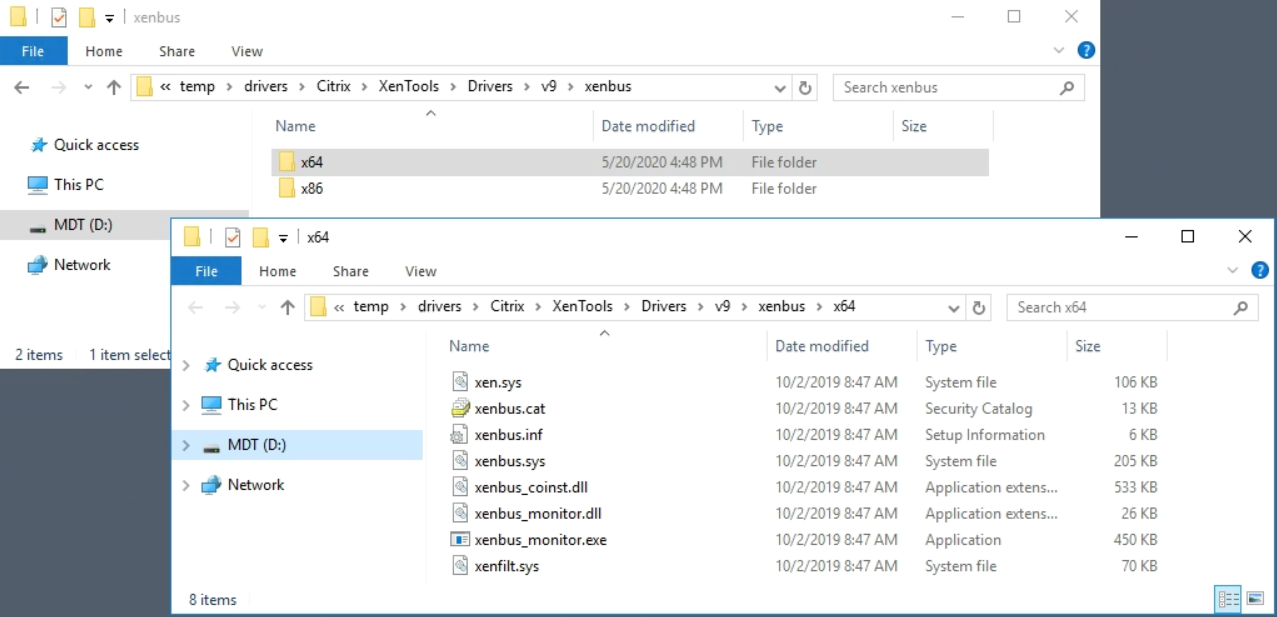
The MSI contains a lot of files and executables, but we're looking for drivers. Fortunately, there is a Drivers folder. Under Drivers there are v8 and v9 folders. v9 holds the newer drivers. Under v9 we have the folders that contain the driver files (both 64-bit and 32-bit versions).
Importing the Drivers
There are five drivers that we will want to import into WinPE. In the following examples, I'm importing the drivers into Microsoft Deployment Tool.
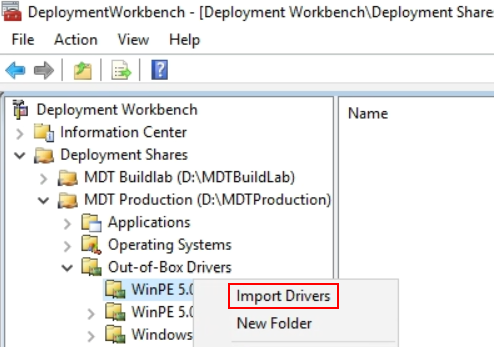
I drill-down to my Deployment Share (MDT Production), expand Out-of-Box Drivers and right-click on WinPE 5.0 x64. The Import Driver Wizard start and we can drill down to the location of our drivers.
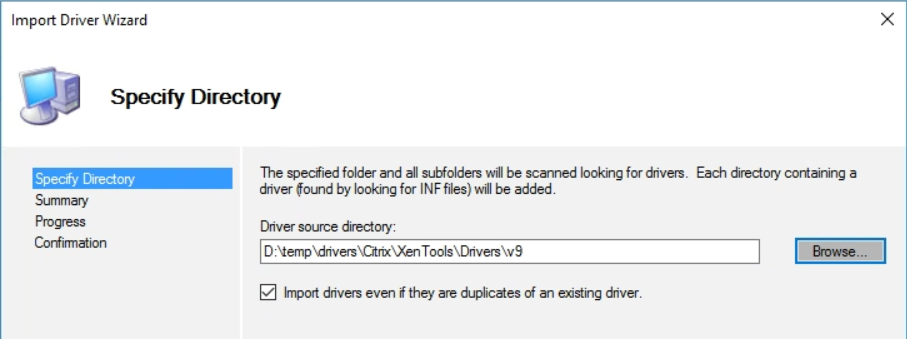
Click Next, Next and the import will begin. At the end a Confirmation window will display the status.
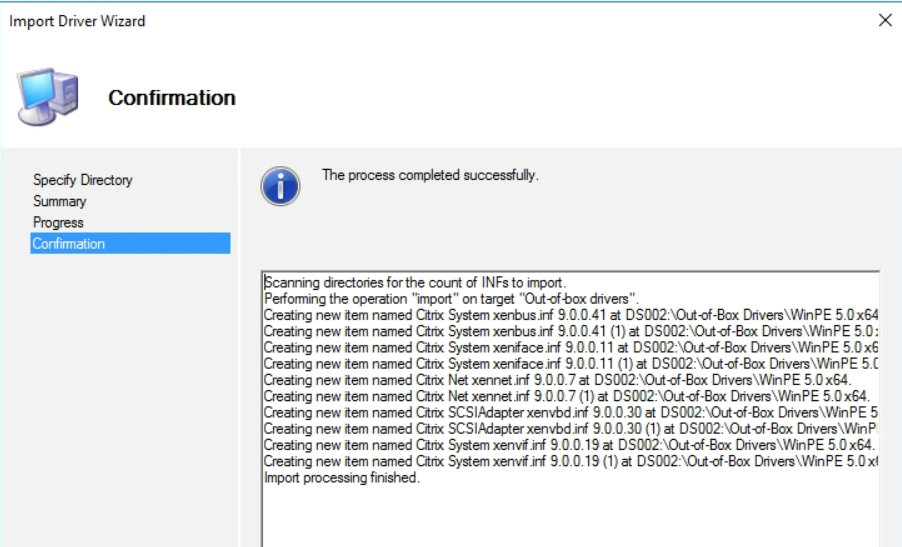
Since I didn't drill down into each driver folder, the wizard imported both the 32-bit and 64-bit versions of the drivers. I can delete the 32-bit versions by selecting them, right-clicking, and choosing delete.

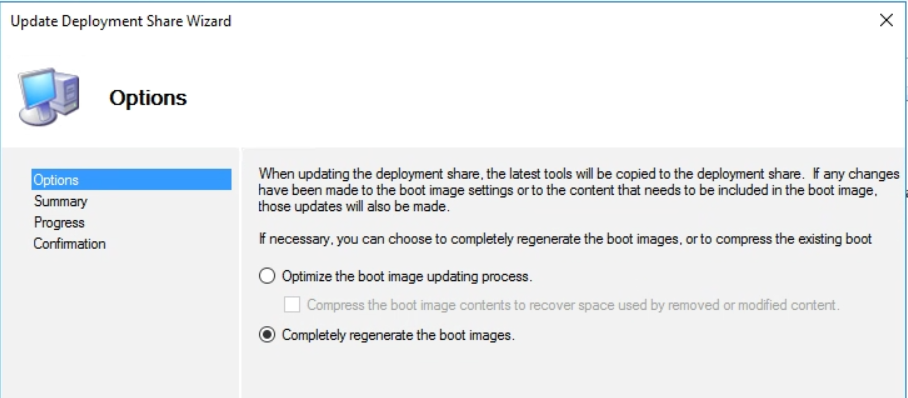
Now to use the new drivers, you right-click on the Deployment share and select Update Deployment Share.
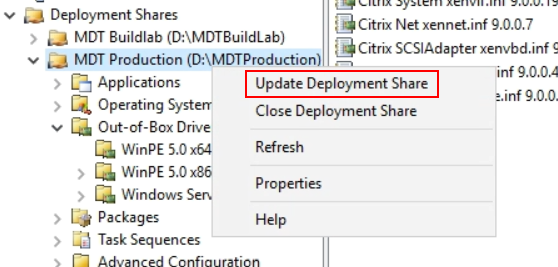
The Update Deployment Share Wizard comes up. My preference is to always choose "Completely regenerate the boot images." This takes longer, but the results are consistent.
The wizard will complete and a new ISO is generated in the Boot folder under your deployment share.

You copy this ISO to your XenServer ISO share, and when you want to build a new image, you point your XenServer virtual machine to this ISO and WinPE will use the new drivers you imported.
I hope this post helps you track down the XenServer drivers you need to automate builds in the future. Please comment if you have any questions.
Value for Value
If you received any value from reading this post, please help by becoming a supporter.
Thanks for reading,
Alain Assaf