Once you have your AppSense server and databases created, you can proceed with AppSense Agent installation. In this post we’ll cover a command-line install of the Client Communications Agent and getting the device to Self-Register.
AppSense provides all their install components as MSI files (located under \Software\Products). Here is an example of a silent install of the Client Communications Agent which is required on all servers that you wish to manage via AppSense.
msiexec.exe /qn /i "<MSI file path>\CommunicationsAgent.msi" WEB_SITE="https://<Management Server Name>" GROUP_NAME="<DeploymentGroup>"
NOTE: Above quotes are needed.
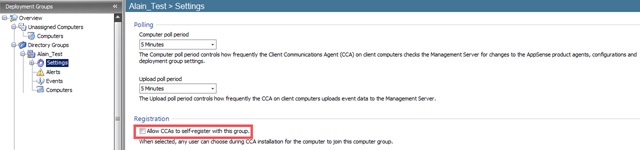
After installation, your system will join the default Unassigned Computers deployment group, it will then Self-Register to another Deployment Group if wanted. To set this up, you must put the Deployment Group in the above command-line installation. You must also check the following box on the Settings Section of your Deployment Group:
Once part of a custom Deployment Group, it will install the other AppSense agents and configurations that are part of it using your installation schedule settings.
Value for Value
If you received any value from reading this post, please help by becoming a supporter.
Thanks for reading,
Alain